Janbouli´s Golftees Inc.
Darryl from Inter-Action Hobbies has done me a great honor by naming his new kit Janbouli's Goltees Inc. As you may understand I am very excited to build this. I hope I can make this build thread understandable and enjoyable enough for you to be aible and wanting to build this.
 The contents of the package. The kit is made from stabilized resin impregnated board, with very crisp detail and yet strong enough even for the smallest parts.


 The signs are as you can see spectacularly detailed.

 These are the instructions I got from Darryl, I assure you the real instruction book will be fully detailed and with color pictures, as I have gotten used to seeing from Inter-Action Hobbies


Let's get on with the build.
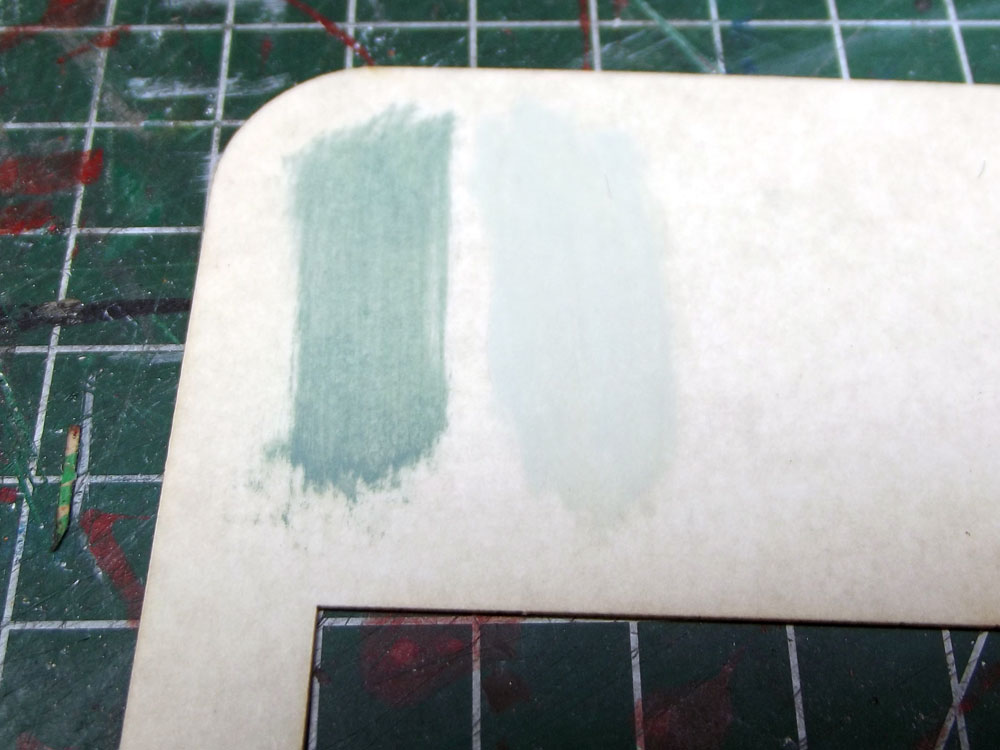 First choosing colors. I have gone for the painted concrete in Ivory White and doors and windows in Tamiya Light Blue. Of course you can use any colors you like , I would however keep it to light colors that would have been more prototypical because they were easier to paint concrete evenly with.
 First I primed all pieces with spray can grey primer.
  The windows painted Tamiya Light Blue, which is oddly enough a greenish color more then blue.
 All the walls also primed grey.
 The outer walls airbrushed ivory white.
 On to the phase of glueing the inner walls to the outer walls. I made small strokes of wood ( anything will do as long as they're thicker then the 2 walls together and evenly wide.
 2 of the walls that belong together.
 Line up the bottom of the walls using the wood spacers and at the same time line up the window and door openings.
 The 2 walls stuck together. I used Super Phatic glue from Deluxe Materials througout this whole build , it bonds wood , plastic and PC board, cures fast yet leaves just enough time to fiddle a bit.
 Because I don't have instructions ( you will certainly have them ) , I wasn't sure how to line up all the walls, so I test fit to see.
 These walls lined up against the edge of the walls.
 All the walls glued together.
 Glued the large doors on the inside, this is where I made my first mistake, I lined up the door with the bottom of the wall , I should have left some space at the bottom, you'll see later on.
 Door from the outside and my second mistake , the grey beam should go on top of another beam to give it some thickness.
 Inside of the double door.
 Windows are made of 3 pieces , the first piece to glue on is the one with the thinnest mullions, next the piece with the ticker ones and third the glazing.
 Using a weight to line up the window pieces.
 Glue to the inside , line up with the window openings in the outer wall.
  It will look like this from the outside.
 Window glazing.
 Glue the window glazing in place.
 Another wall from the outsie with windows, glazing and door in place.
 All the walls ready for assembly.
 Another test fit. This is when I found out I should have placed the large doors a little higher.
 Bending the curved wall around a marker. The board is more then flexible enough.
 First placed the back wall using my weight cubes to get it nice and square.
 Left wall in place , I braced the corner with a piece of stripwood.
 The door thats too low.
 Cut a piece out of the floor piece that goes inside the walls.
 Placed the floor piece and another corner piece to make the curved corner easier to fit.
 Placed the curved wall, all the walls fit exactly into the slots on the base board.
 Weights gone and the curved wall stays exactly as it should be.
 Pieces of stripwood to help support and keep the upper roof frame in place.
 Place the roof frame and first glue it to the square corner walls. Let this thoroughly dry.
 When you're sure the roof frame is fixed to the straight walls then glue to the curved walls and hold in place with clamps, I used these from Micro Mark.
 Close up , there will be some tension in the curved corner , thus the clamps to keep it in place till cured.
 Use some wood or cardboard to protect the outside walls from damaging by the clamps.
 Next glue in the inner wall with the 2 slots. And then place and glue the front wall with the entrance.
 The 2 walls that form the inside of the entrance come next.
 While the thin entrance walls are curing , you can glue in the inner walls and strips that hold up the floor of the upper level. If you want ot do an interior on the ground floor of the office part now is the tme to do it, I will not be doing an interior for this kit , most of the windows aren't large enough to show much of it. You will see later that the exterior details to this kit make this kit special.
 These are some of those inner walls.
 When all the walls have dried , gently press the floor into place.
 I did do a bit of interior to the entrance hallway, I took 2 small blocks of stripwood drilled holes in them and stuck some shrubbery in them as plants that you will find in many entrances to businesses. 2 pieces of dark cardboard stuck to the walls on each side of the entrance resemble doors.
 Next up is the canopy, I like many who saw the first drawings thought that the canopy bent up a bit , this is however the eye tricking the mind. It´s flat but because it goes around the curved corner looks like it bends up. Paint the top and bottom of the canopy and the trim.
 Then glue the trim to the longer straight side.
 Then using the piece of wood the canopy was cut out of , fix the trim around the curved corner. Just push it together and hold the pieces in place with some weights till it has cured.
 Cut of the trim where needed and glue the canopy to the structure.
 One of the roof pieces , I used transfer tape to fix the tarpaper roofing to the roof.
 And with a bit of cutting to size ( really just a tiny bit ) the 2 roof pieces are finished.
 The pieces to the side entrance.
 Put together ready for priming.
 The pieces for 4 airconditioning units.
 The slightly smaller piece with the 2 holes go's on the inside.
 The piece with the fans on top of that.
 Airconditioning unit ready for primer.
 Back entrance stairs.
 Different signs to be made. Primed with flat grey first then painted yellow with Tamiya spray can.
 Painted blue and then most of the blue paint rubbed off, trims placed and all glued to a brass rod provided in the kit. THe sign "Made one at a time is 4 mm high to give you a sence of size.
 On to the dust collector, also available separately from Inter Action Hobbies.
 Pictures of the sub structures, the lasercutting is crisp enough to be aible to read the very small lettering.

 Slow progress, I primed and painted the parts of the dust collector.
 St Lawrence Blue , the bottle to the right to give a sense of size.
 Started scenery on JB's today, painted the whole board asphalt gray first then placed sidewalks.
 Then filled the places where grass and shrubbery will come with a mix of plaster of paris with brown pigmentpowder. I shake on the mix , flatten it a bit and then with a pipet soak it with water , when it dries it will stick to the foam , after that I can place static grass and shrubs.
 After the plaster mix has dried.
 Some static grass added.
 Final photo's of the finished structure.


 Next to Jacobs Welding, the way I have it in mind for my layout.


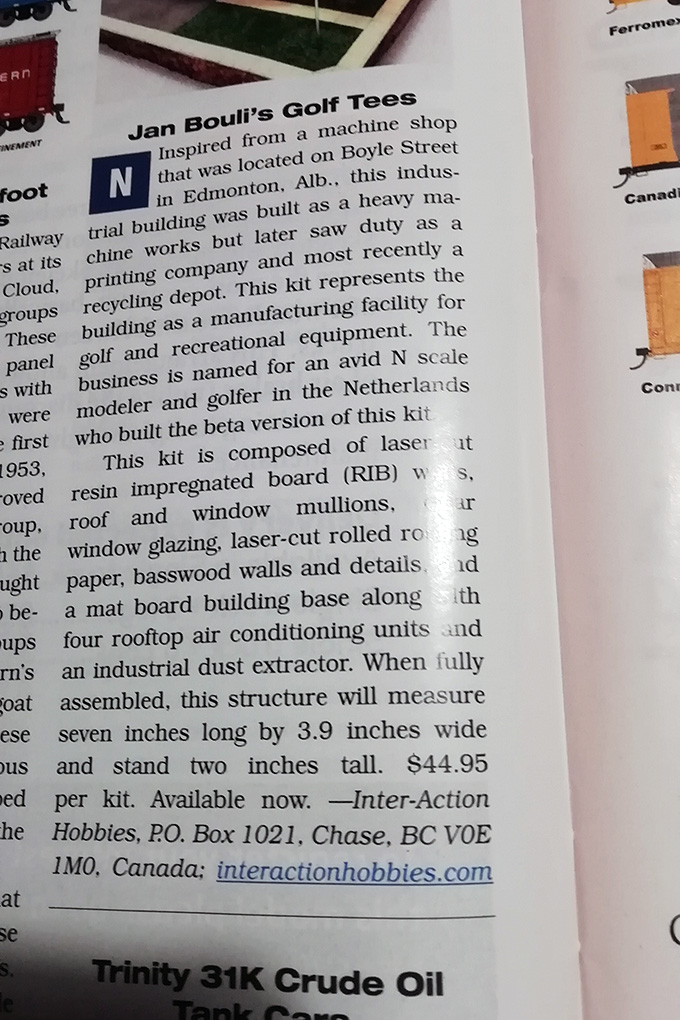 And then a few years later there's an advertorial in RMC